Azure Remote Rendering (ARR) in Microsoft Mesh with HoloLens - How To Mesh😎
How to bring big and complicated 3D models into our Mesh environments on HoloLens 2 by utilizing Azure Remote Rendering.


Welcome to the second edition of my new How to Mesh -series, where we dive into Microsoft Mesh and how to do all of the awesome stuff possible in it! For the first part, read my last blog here!
 Miska Kytö
This time, we're looking into how we can bring big and complicated 3D models into our Mesh environments by utilizing Azure Remote Rendering (or ARR for short). ARR is a technology created by Microsoft to allow the viewing and use of huge and complicated 3D models on the Hololens by rendering the model and doing all the heavy lifting in the Azure cloud, and just streaming the results to your headset. This is because the HoloLens glasses, no matter how awesome they are, don't have the horsepower to render these huge models on their own.
So, let's see how we can bring the model into Mesh and ARR!
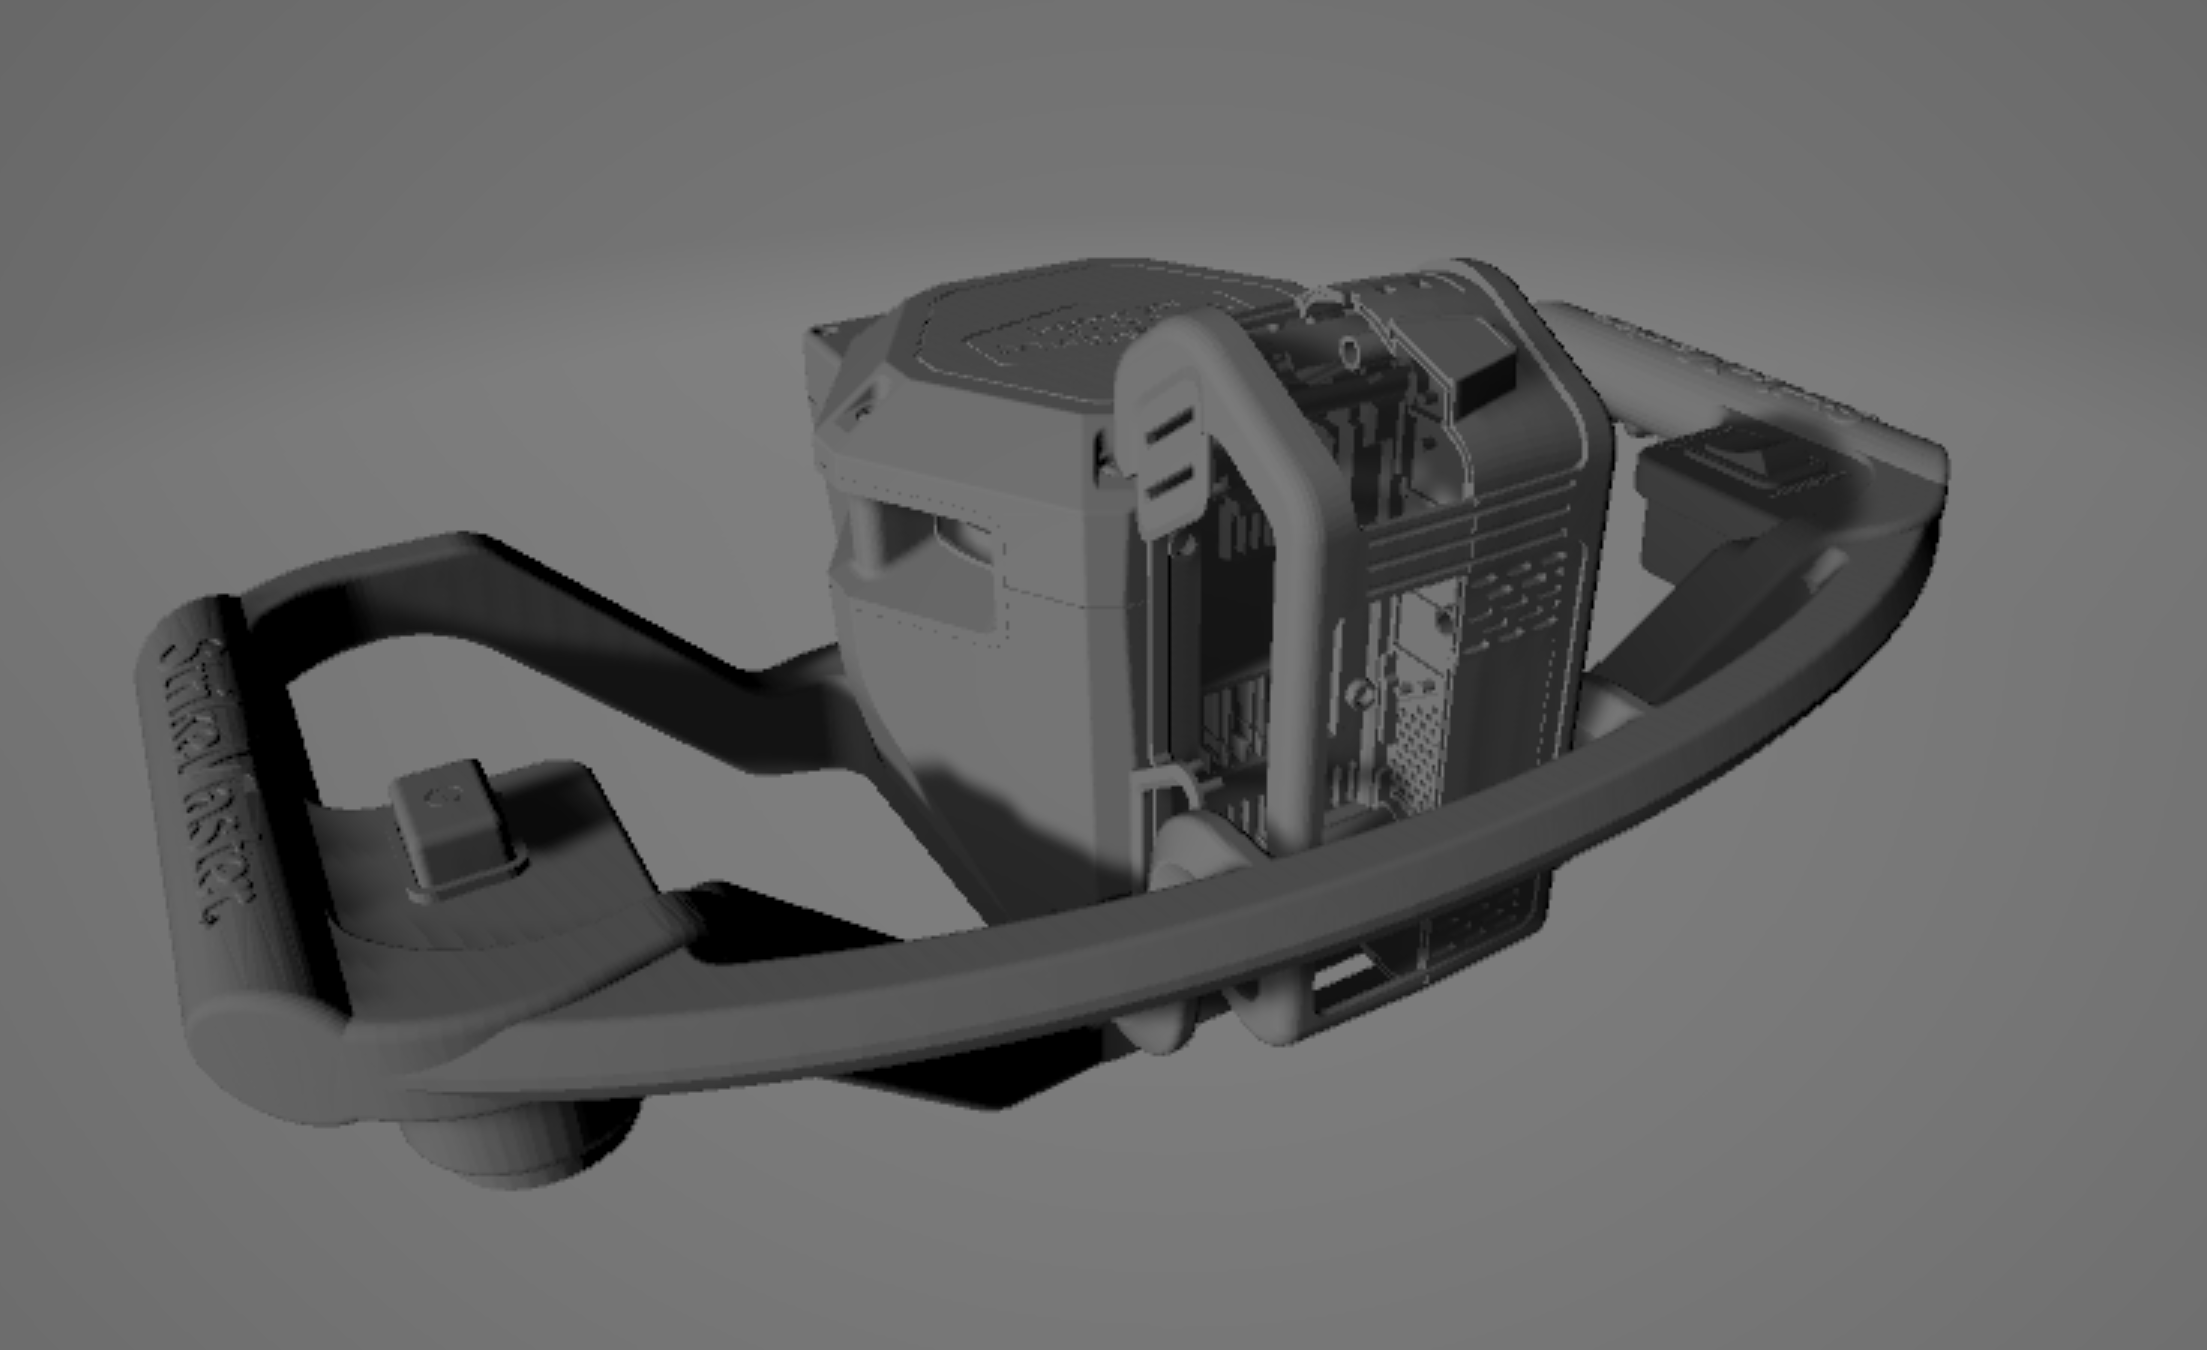
First, we need to obtain a 3D model, for this time, I am using this model from Rapala, a Finnish company manufacturing fishing lures and other related products. This model looks simple, but includes all of the inner parts of the machine, meaning it's a whole 64 megabytes in size.
First thing to do is to convert your file to the right format. For ARR, the accepted file formats are .GLB and .FBX and since I received this model in .OBJ format, I needed to convert it. For this, I used Blender, since it's free and open source. I won't be documenting this process in detail, since it's just a simple Open => Import => Export job.
Now that we have our model ready, we move to the Azure side of the process.
In Azure we need to have the following things
- An Azure subscription
- A storage account with two containers
- An Azure Remote Rendering account
First, let's create our storage account:
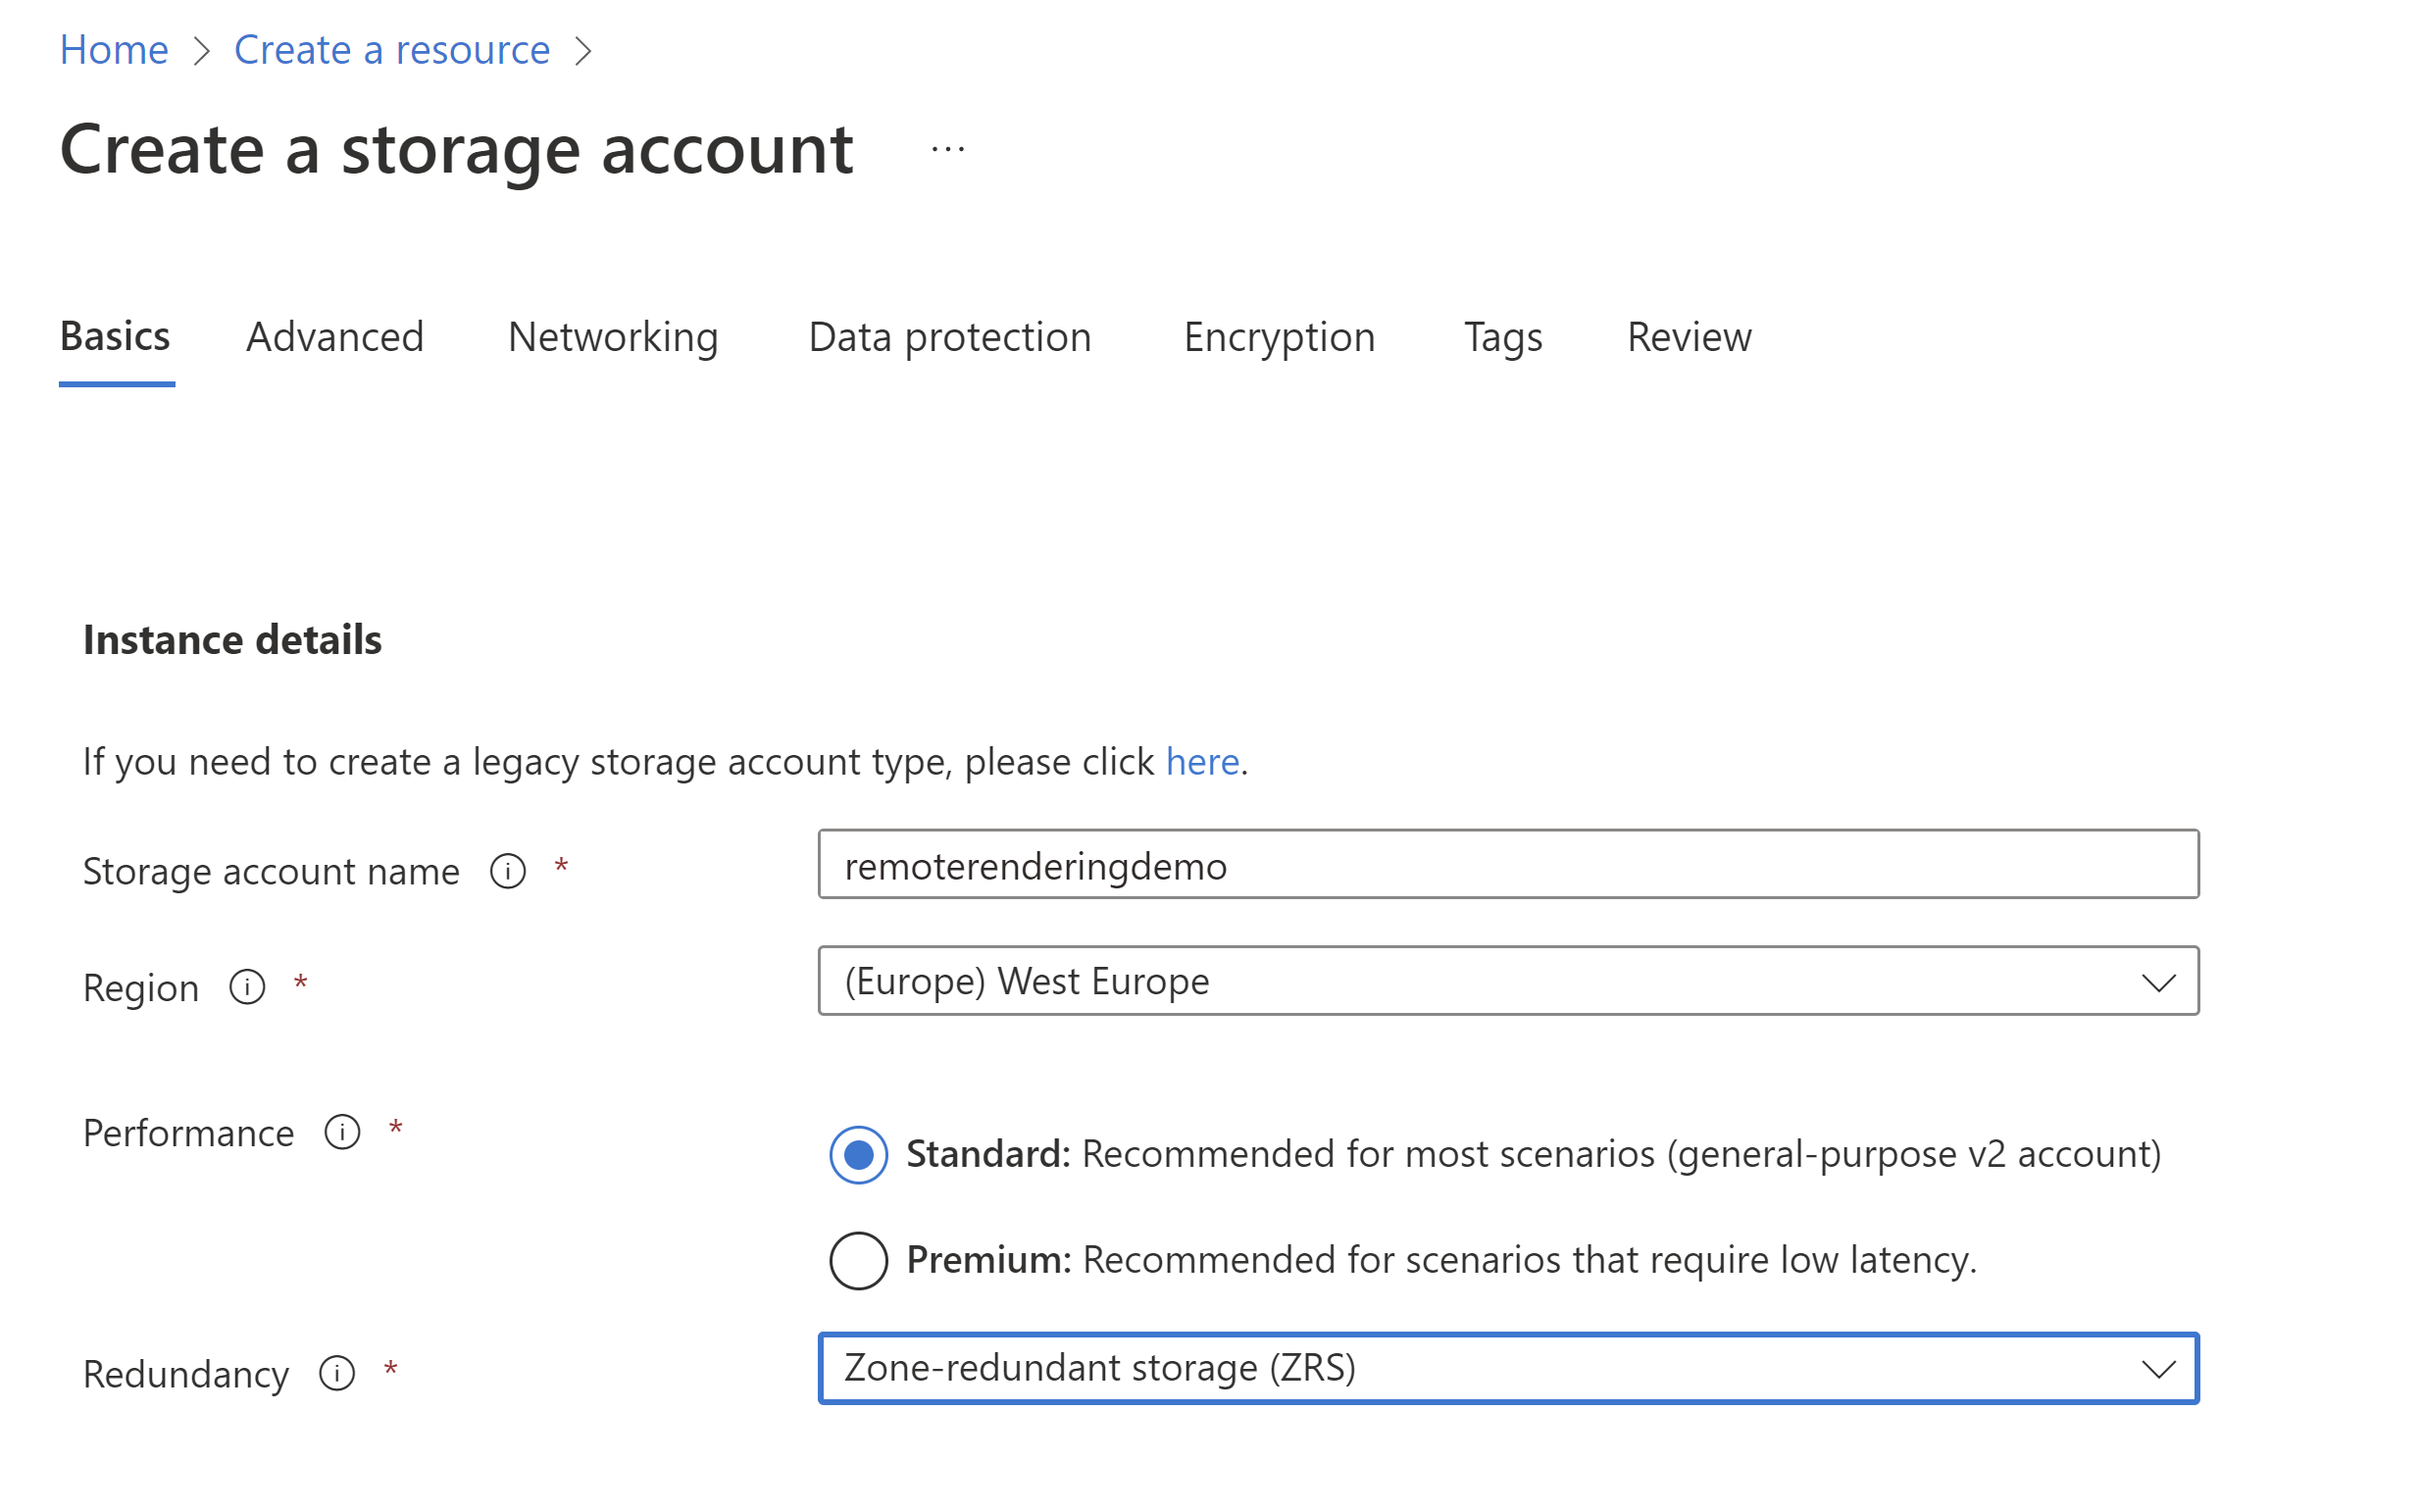
Create an Azure storage account in the region of your choice (mine is West Europe), and choose Zone-redundant storage for your redundancy option. You don't need to touch any other options!
With your new storage account, head down to Containers
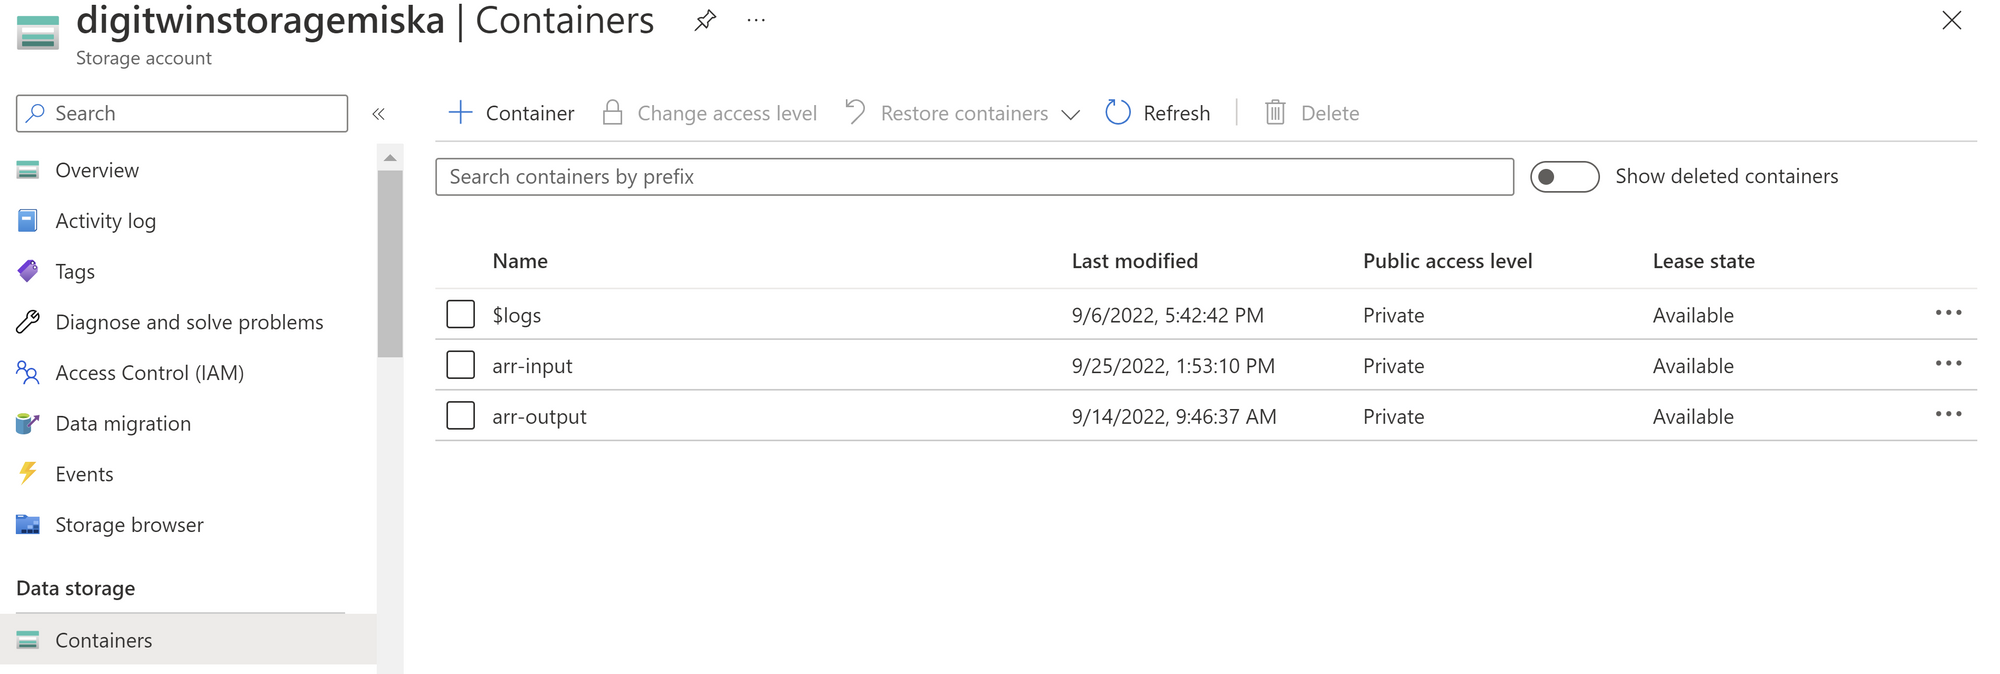
Like you see in the picture, create two containers, one called arr-input and the other called arr-output. Public access level can be kept private for both of these.
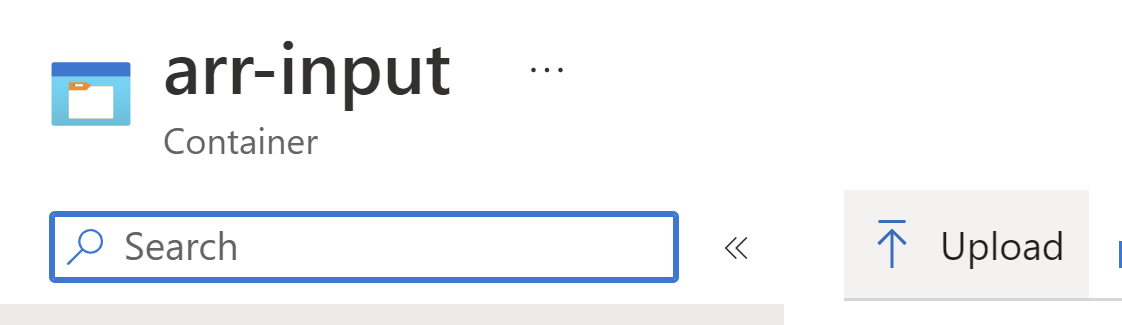
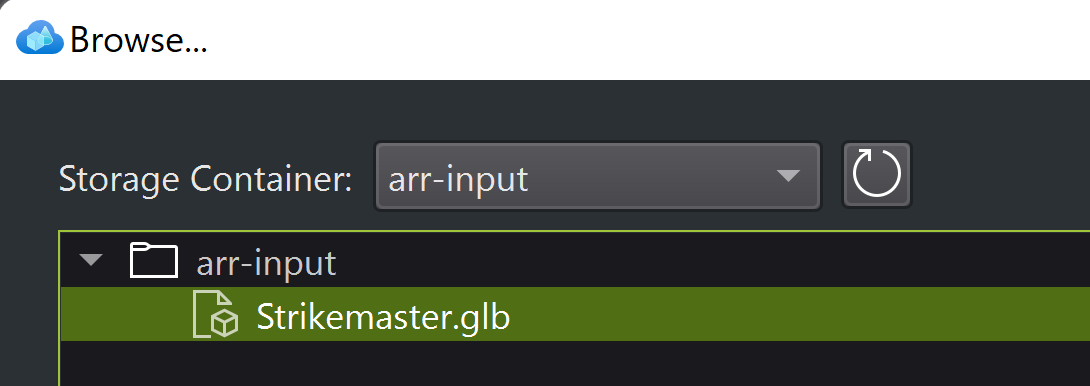
Now, open up arr-input, and upload your .GLB model to this container! It will be waiting for us for later!
Now, search up Remote Rendering and create a new Remote Rendering account:

With these created, we are soon done with Azure. Next, we need to download ARRT (Azure Remote Rendering Toolkit), which is a desktop program required for converting the model into a format ARR can use. You can find the program from Microsoft's Github-page here, and downloading the latest release.
Opening ARRT.exe, we are given a few options to fill out:
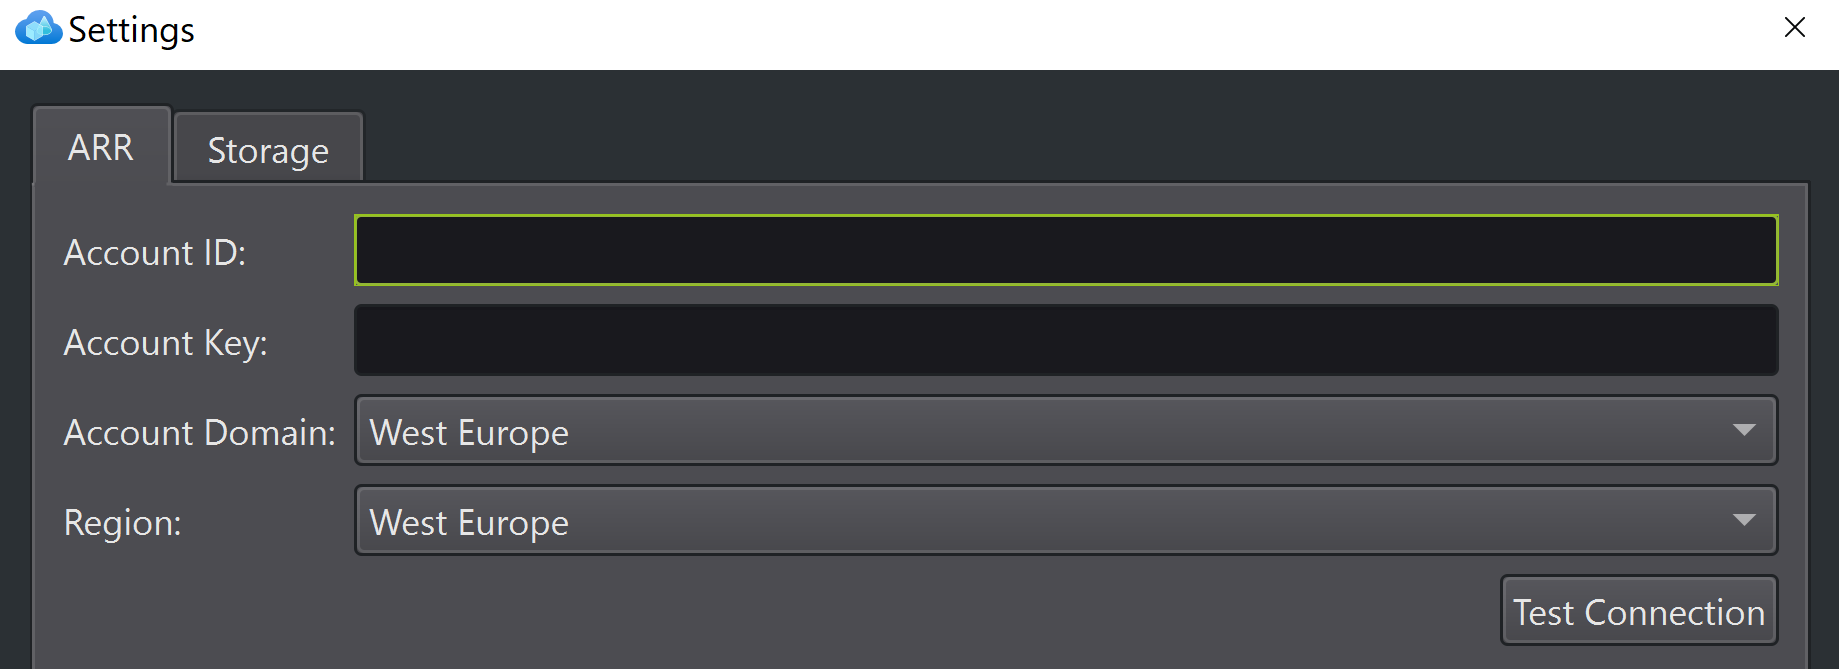
First, we need to input the details to our Remote Rendering account.
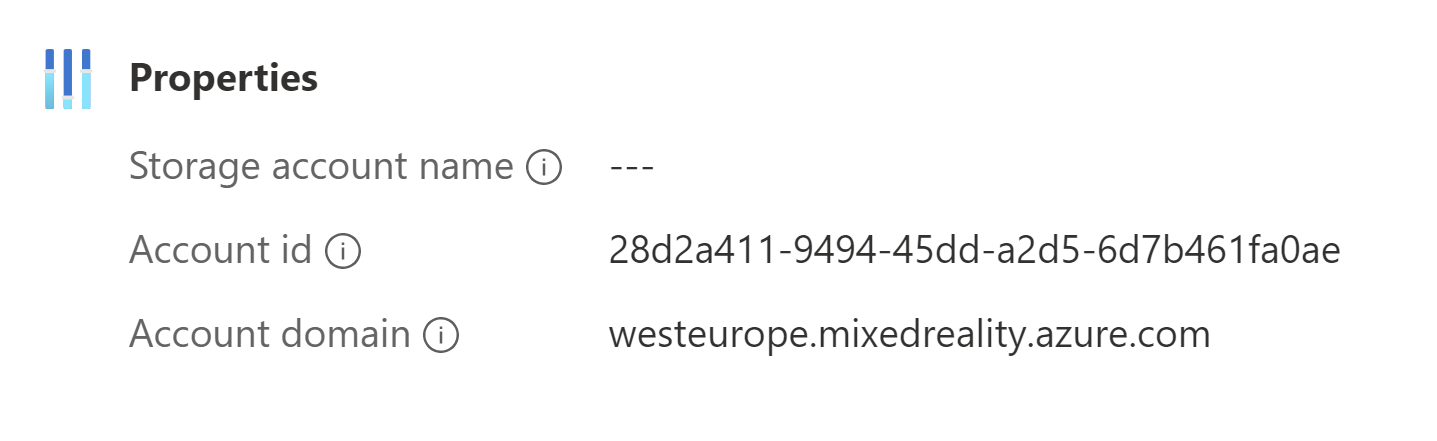
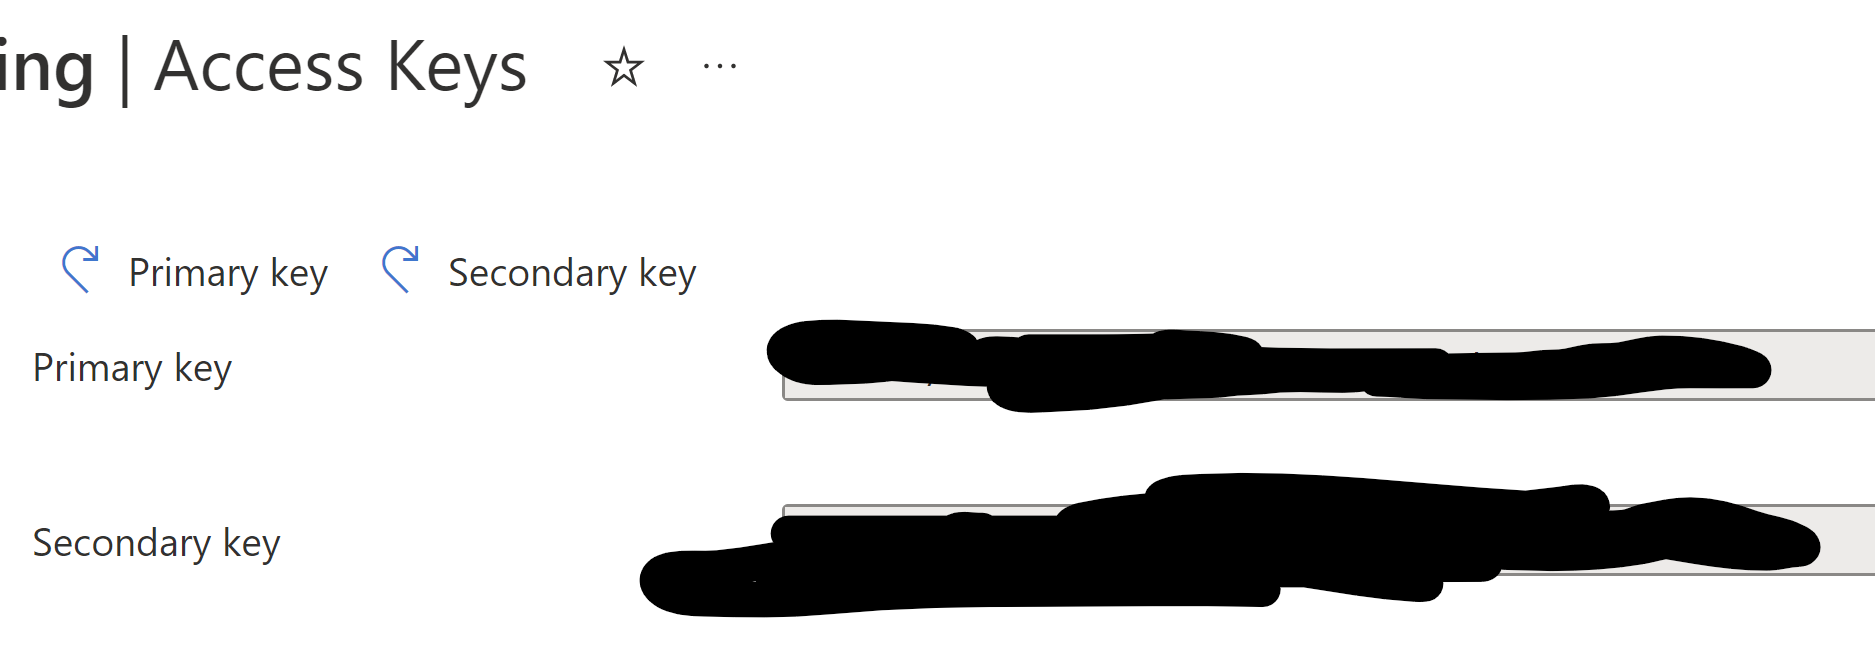
You will find your account ID under properties, and your account key under Access keys.
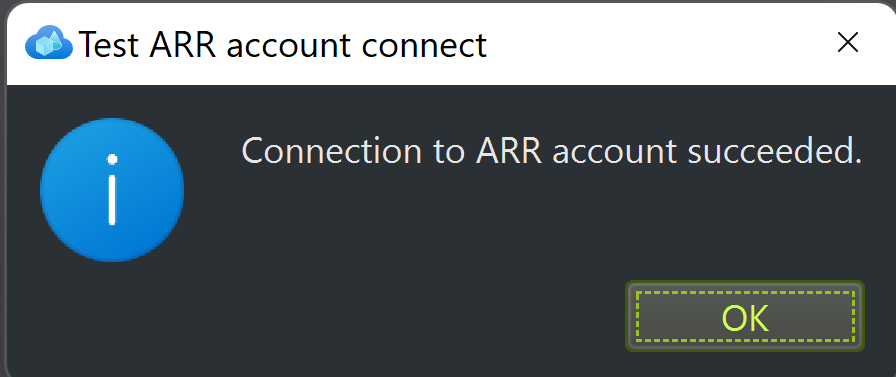
After this, you can test your connection!
Now, moving onto the next tab named storage. Here, you input the needed credentials to your storage account.
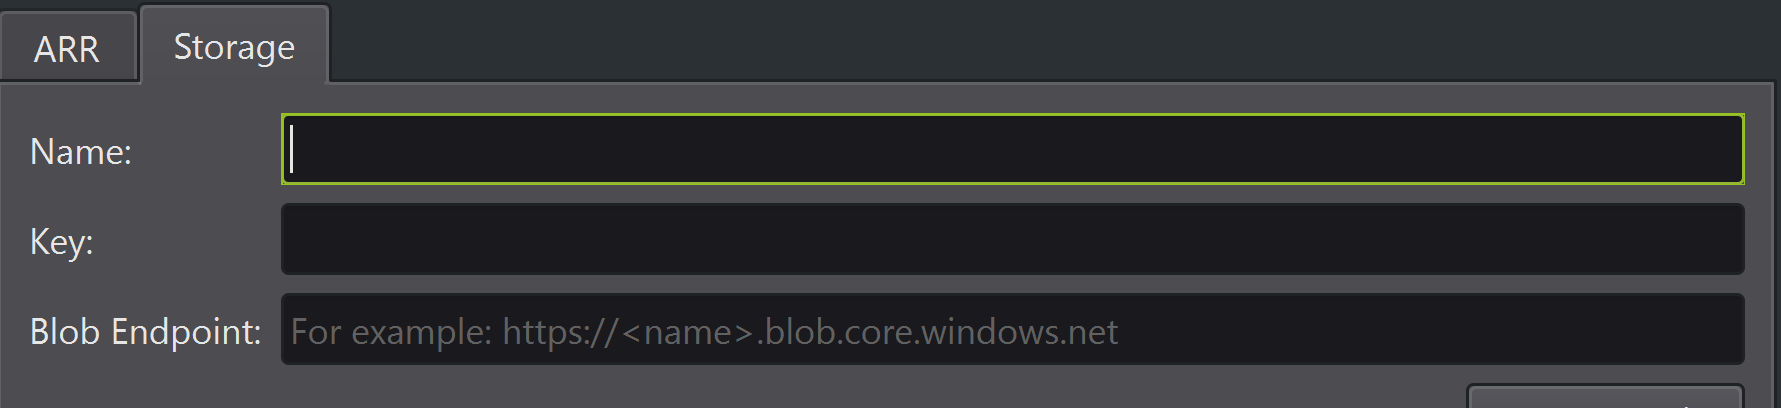
For the name-field, input the exact name you have as your storage accounts name. The key you can find under access keys and once again, DO NOT SHARE THIS KEY! Blob endpoint can be found under Endpoints, titled as blob service.

Once again, you can test the connection, and if it succeeds, we can finally start converting our model!
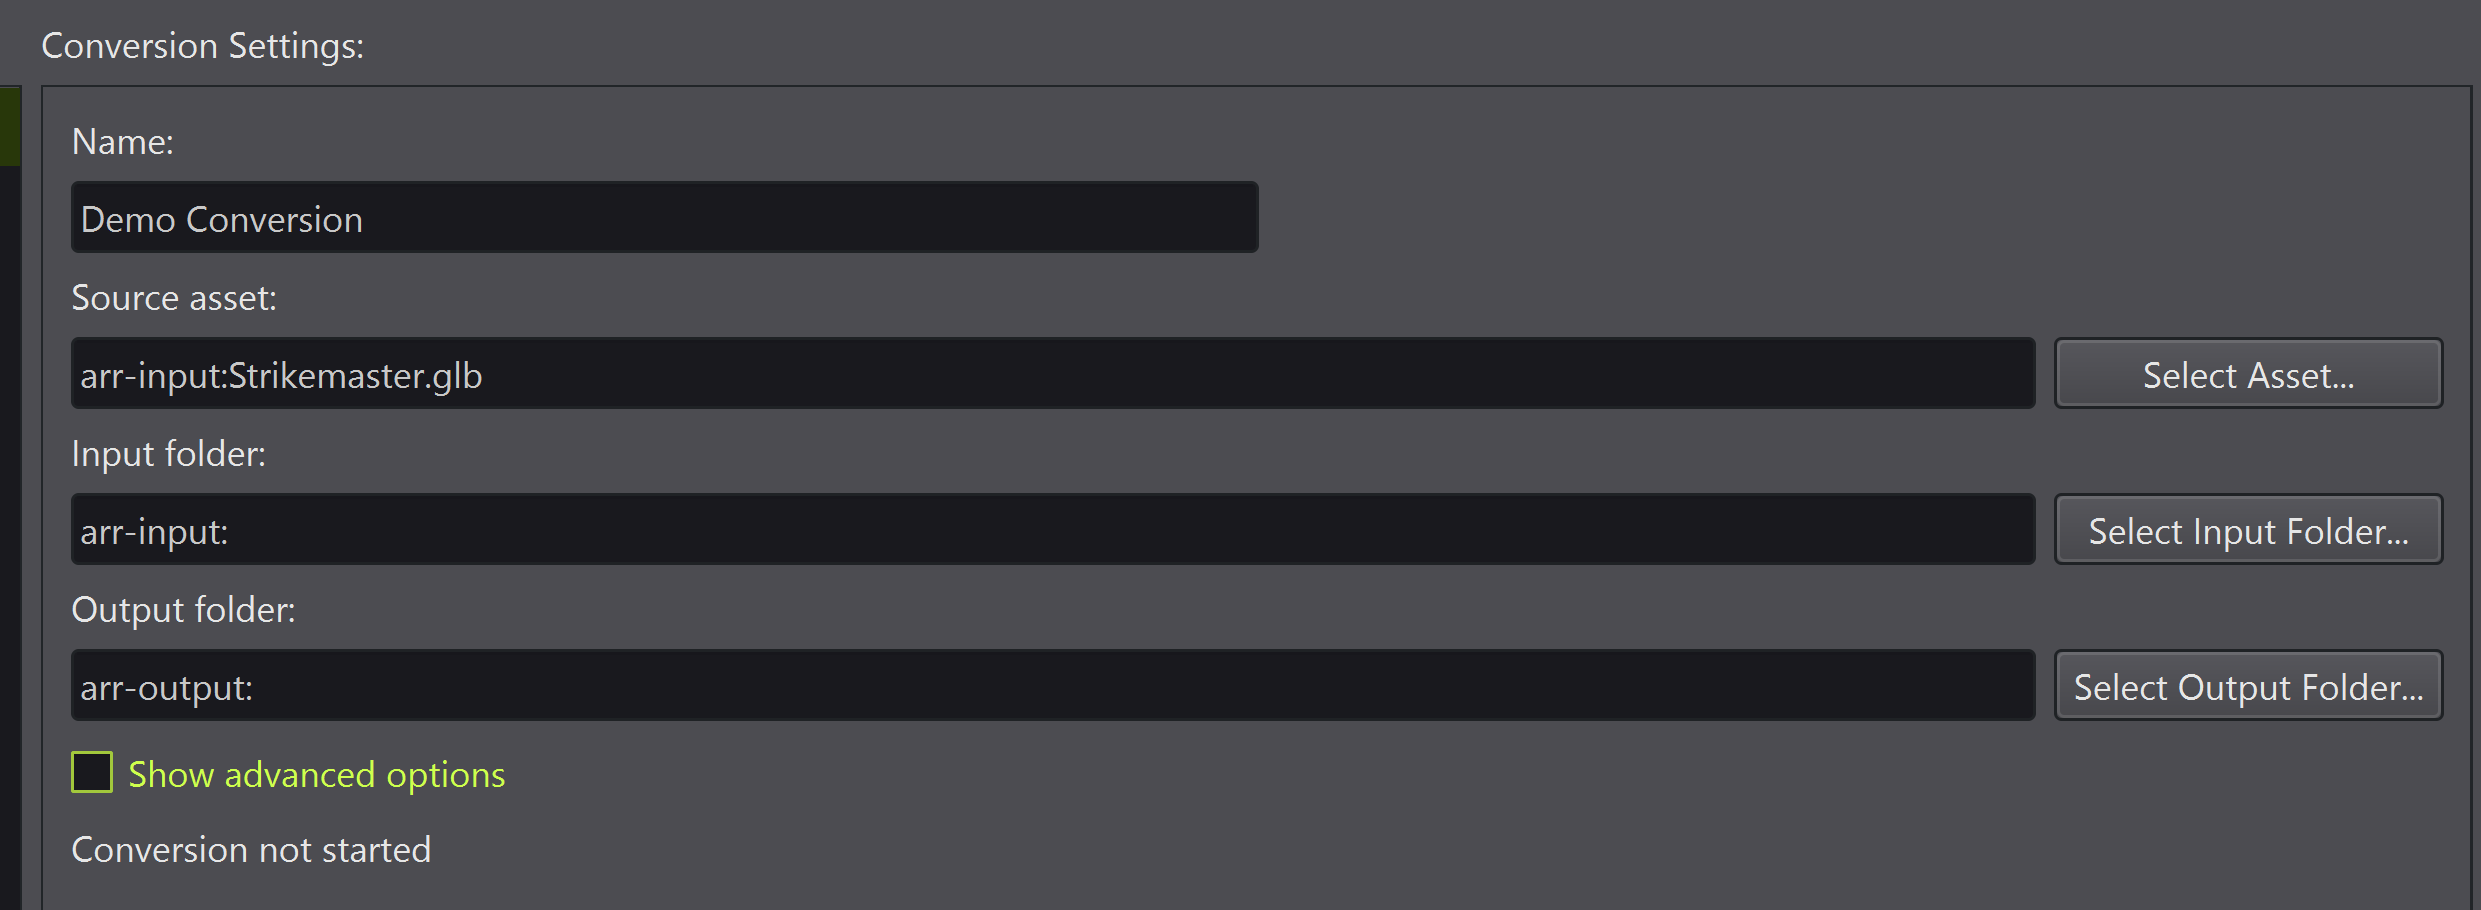
Open the Conversion-tab, and name your new conversion.
Next, open up the browser on Source asset, and choose your arr-input -container, under which you should see your model.
After this, for output folder, choose you arr-output -container.
In the end, your settings should look something like this:
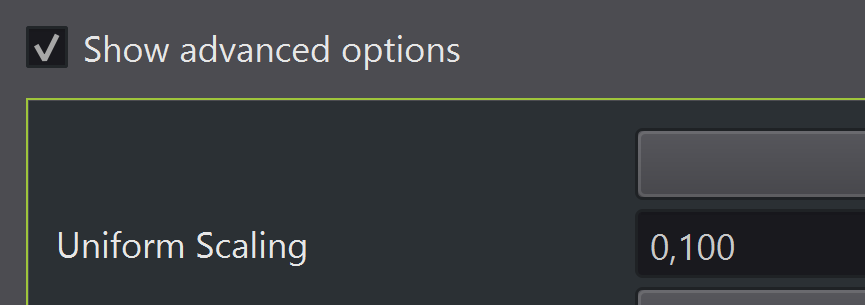
If you open advanced options, you can tweak some of the settings. The one you should possibly tweak is uniform scaling, if your model wasn't scaled to the right size. For me, I scaled up the model in Blender, so I'll scale the model back down to it's original size with a scale factor of 0,100.
Now you can hit Start conversion, and wait for your model to convert. Depending on the model, this could take some time. For my model, the conversion took around 5 minutes.

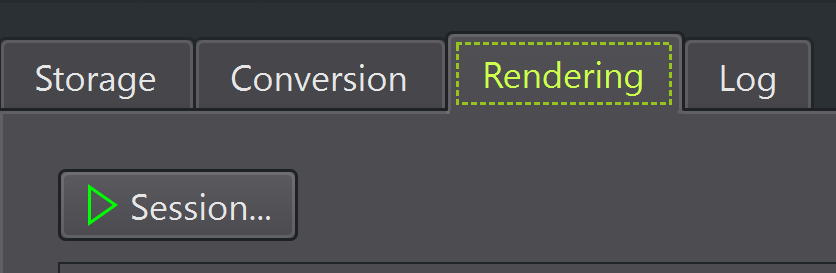
When your model has been converted, you can move to the Rendering-tab and test out how the model works!
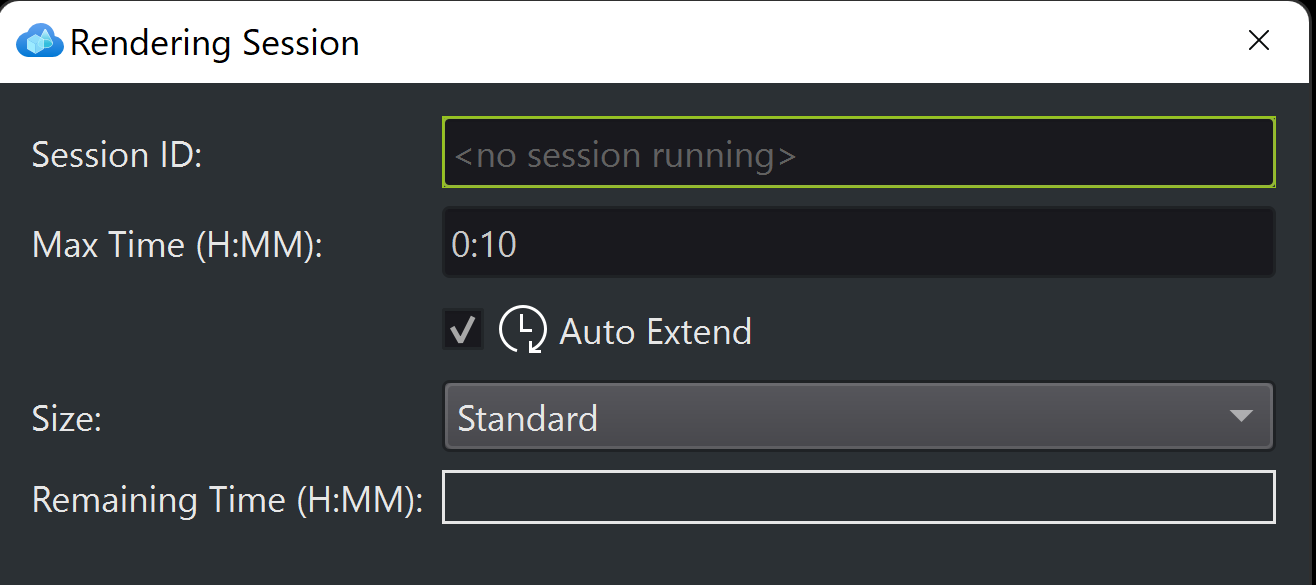
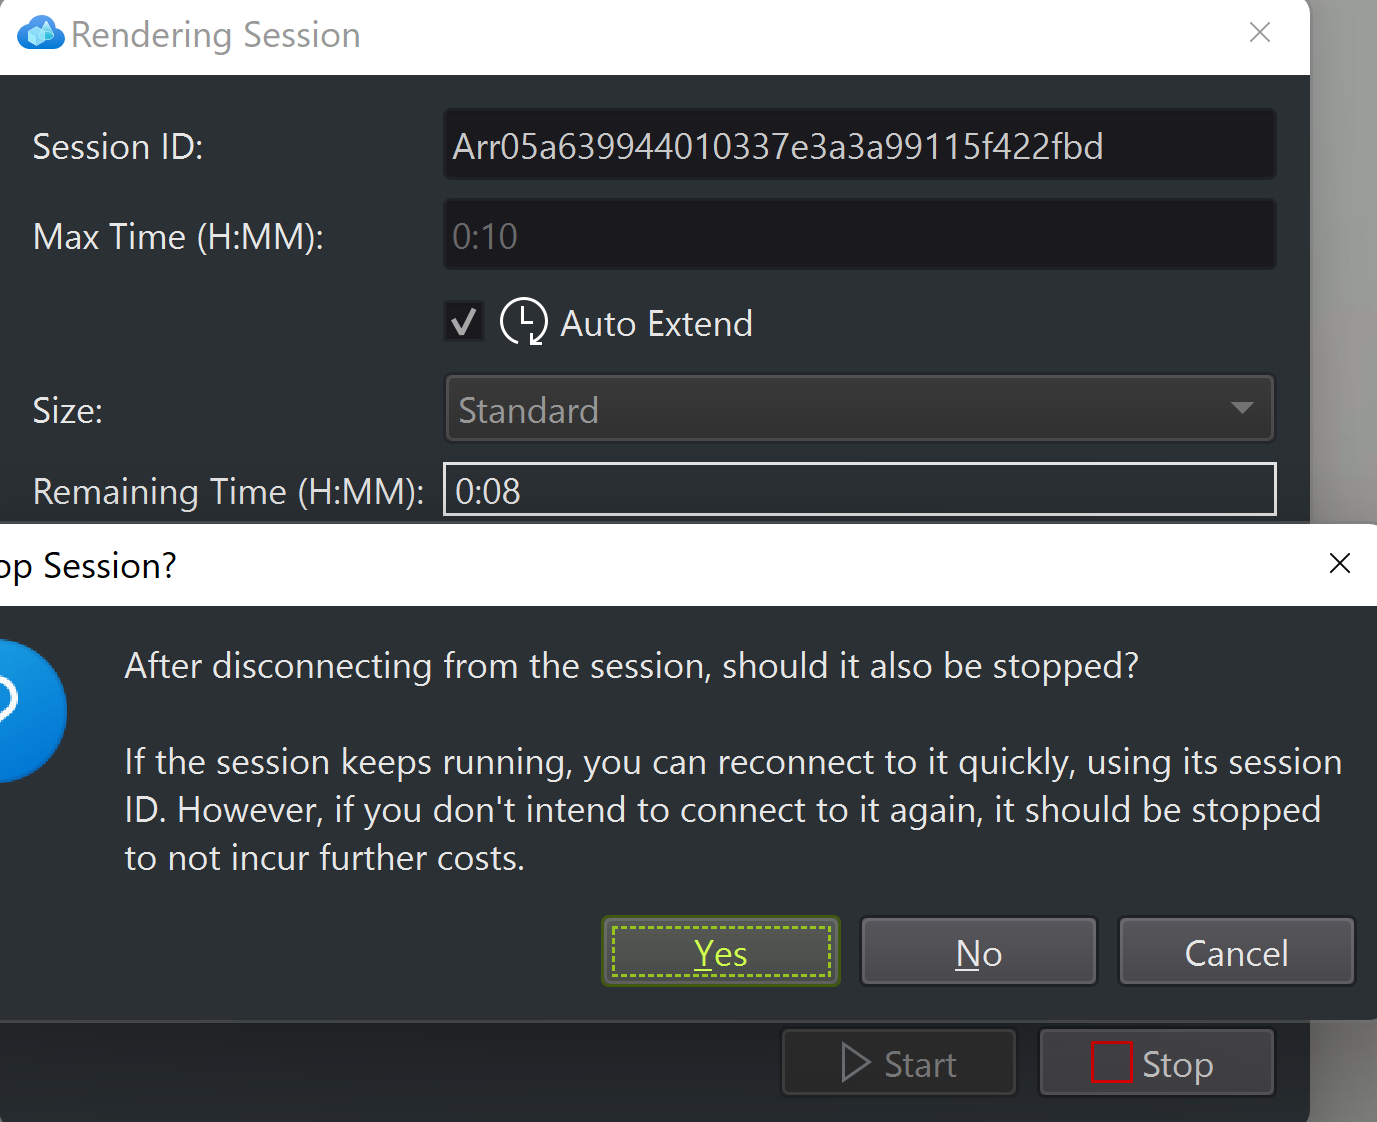
Here, first start your session by pressing the Session-button:
Don't touch these settings, but rather just press Start.
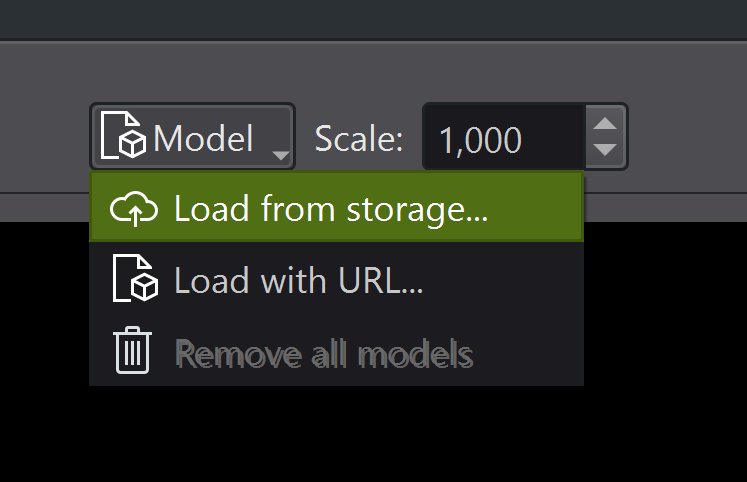
Next, you can choose your model from the top of the window:
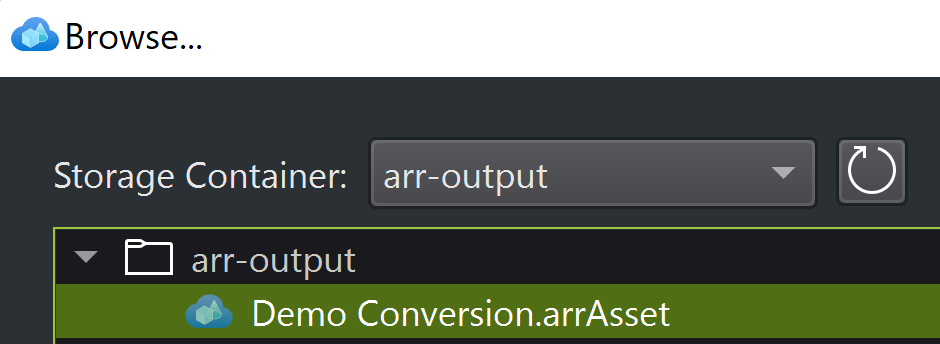
And here we can find our model! Just press Open and wait 🤯
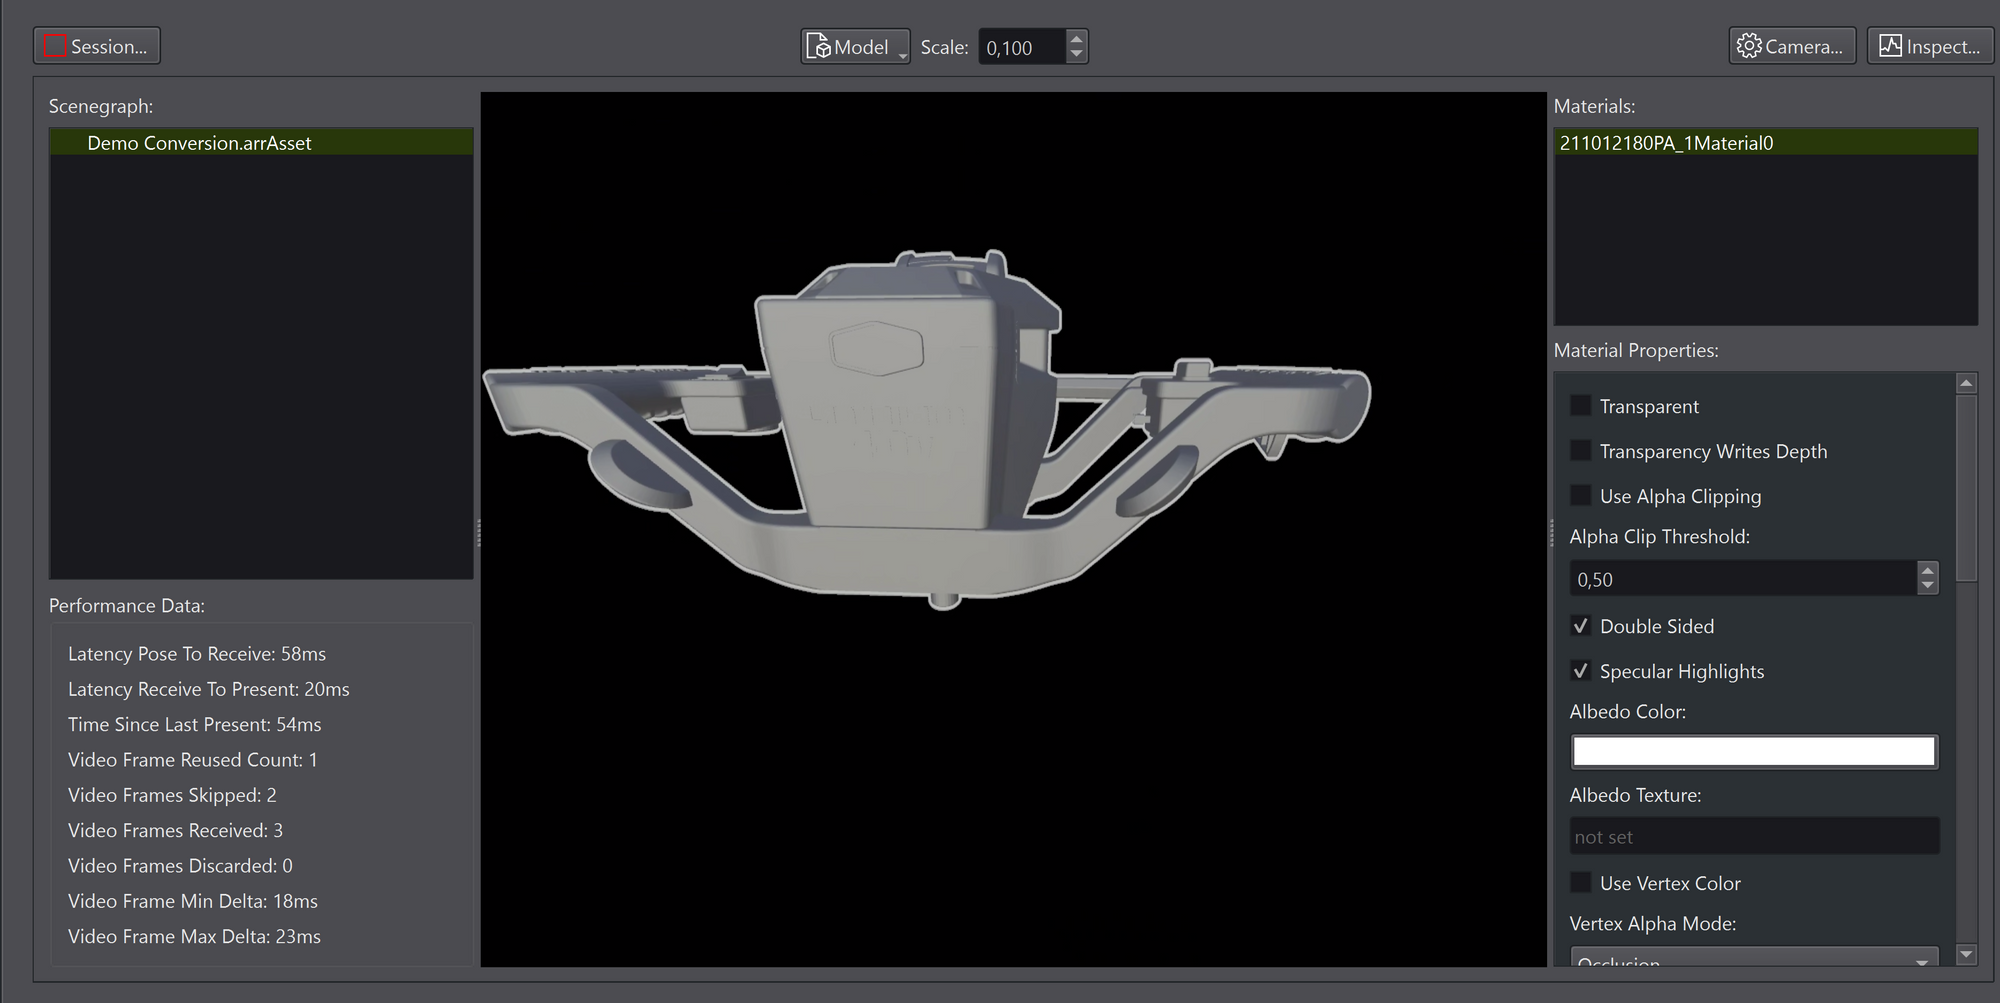
And as we can see, our model loads just fine. Right now, it's rendered in the cloud and not on your computer!
When you're done testing, disconnect the session and don't forget to also stop it. This way, the resources don't get left running and you don't run into big bills from Microsoft 😉.
Okay, so we have converted our model and gotten it to run in the cloud. Now, how do we get this to Mesh?
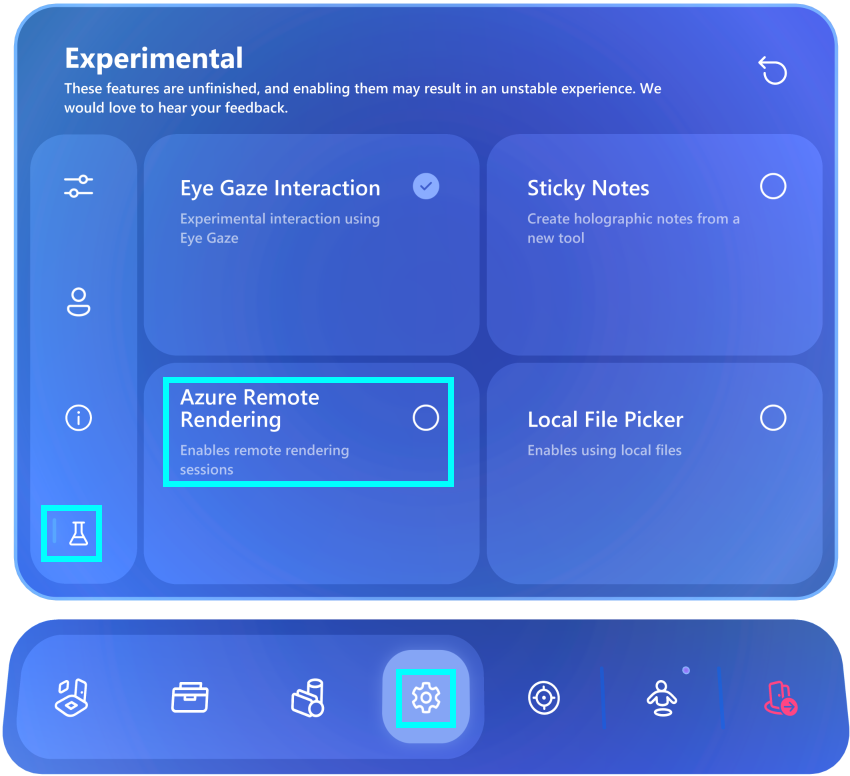
Well, first you need to enable Azure Remote Rendering in the Mesh Preview App on your HoloLens 2. You can find it in the settings under the Experimental Features-tab
After this, in your OneDrive, under the MyContent-folder in Mesh, you will find a new file called remote-models.json
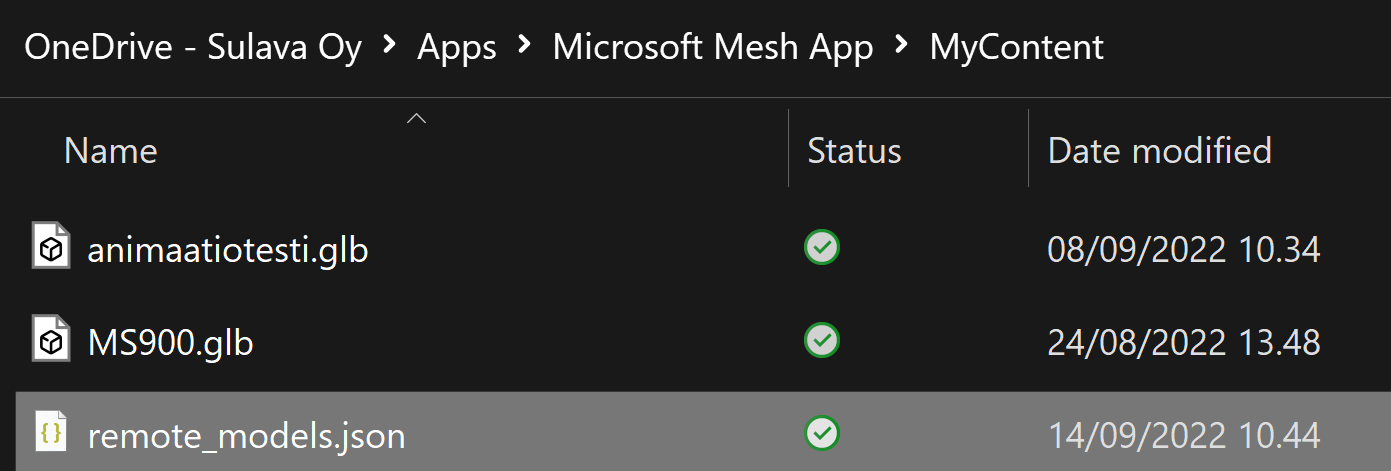
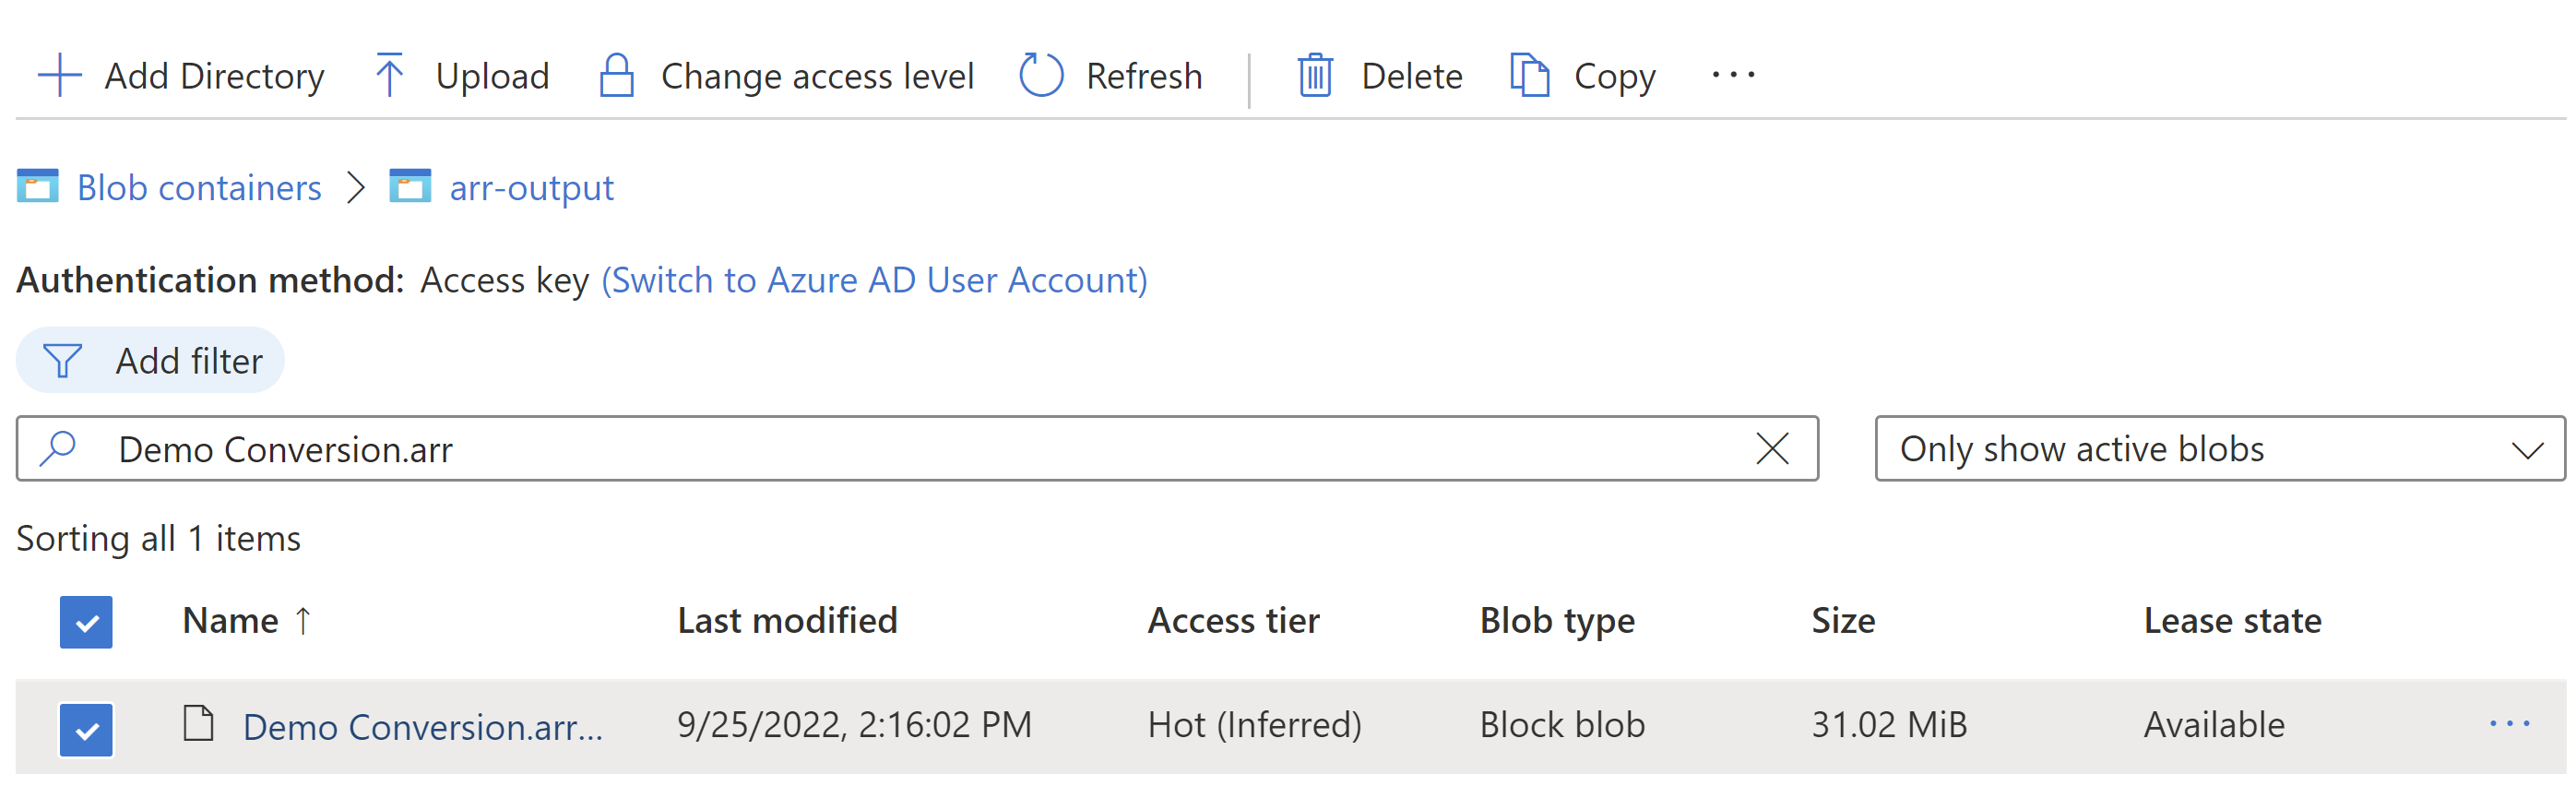
Open this file, and you'll find it includes only the demo-file and it's URL. You'll need to add your own models SAS-URL here. You can create that URL in the Azure Storage Account, under Storage Explorer, search your file and right-clicking on it.
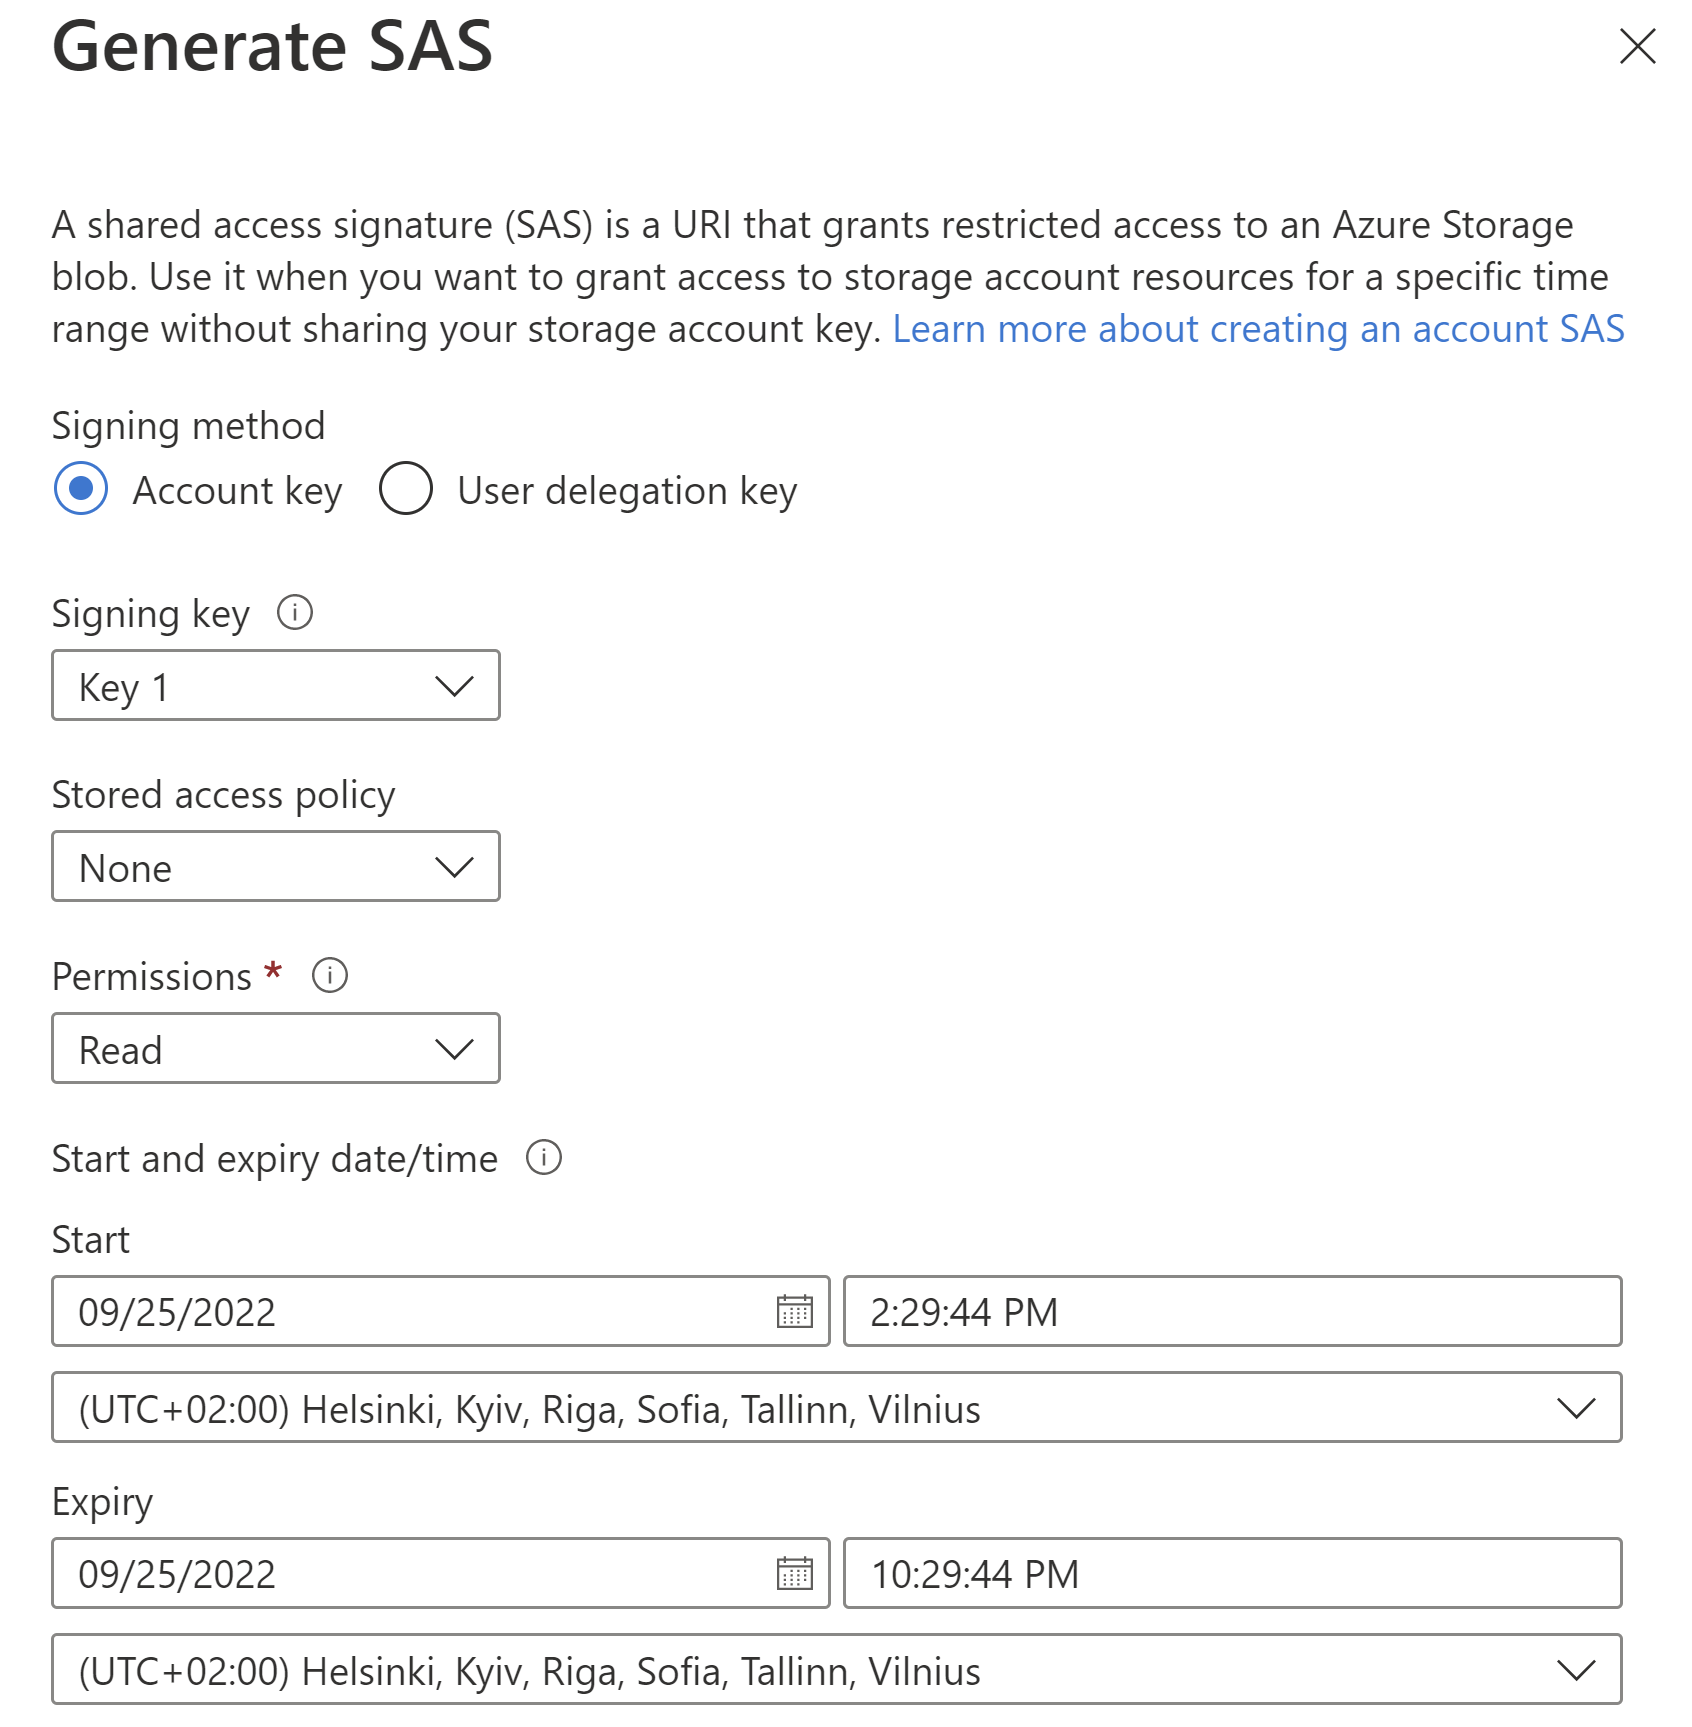
You can decide the start and expiry times of the key, make sure they are long enough if you mean to use the model in Mesh for a longer period of time. After setting these, create the SAS URL.

Now, copy this URL and head back to the remote-models.json file and add a new object to it like the following picture shows:
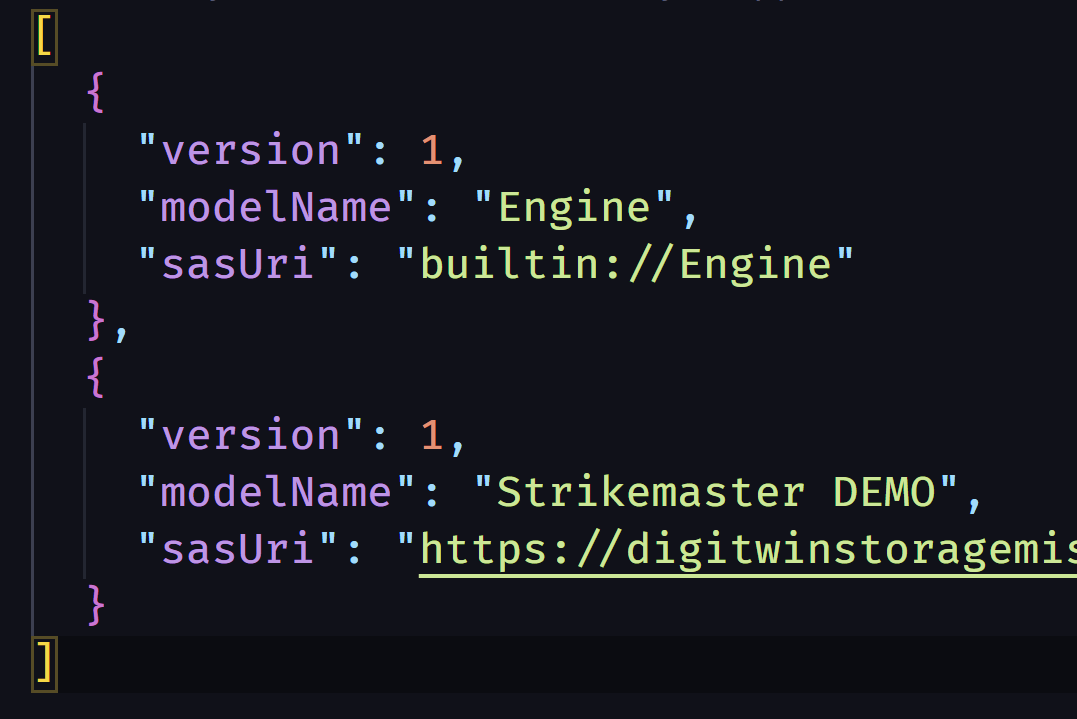
You can name your model whatever you want, and then save the file.
Now when you open up Mesh on your HoloLens and navigate to the ARR-section of your models, you should find your new model there!
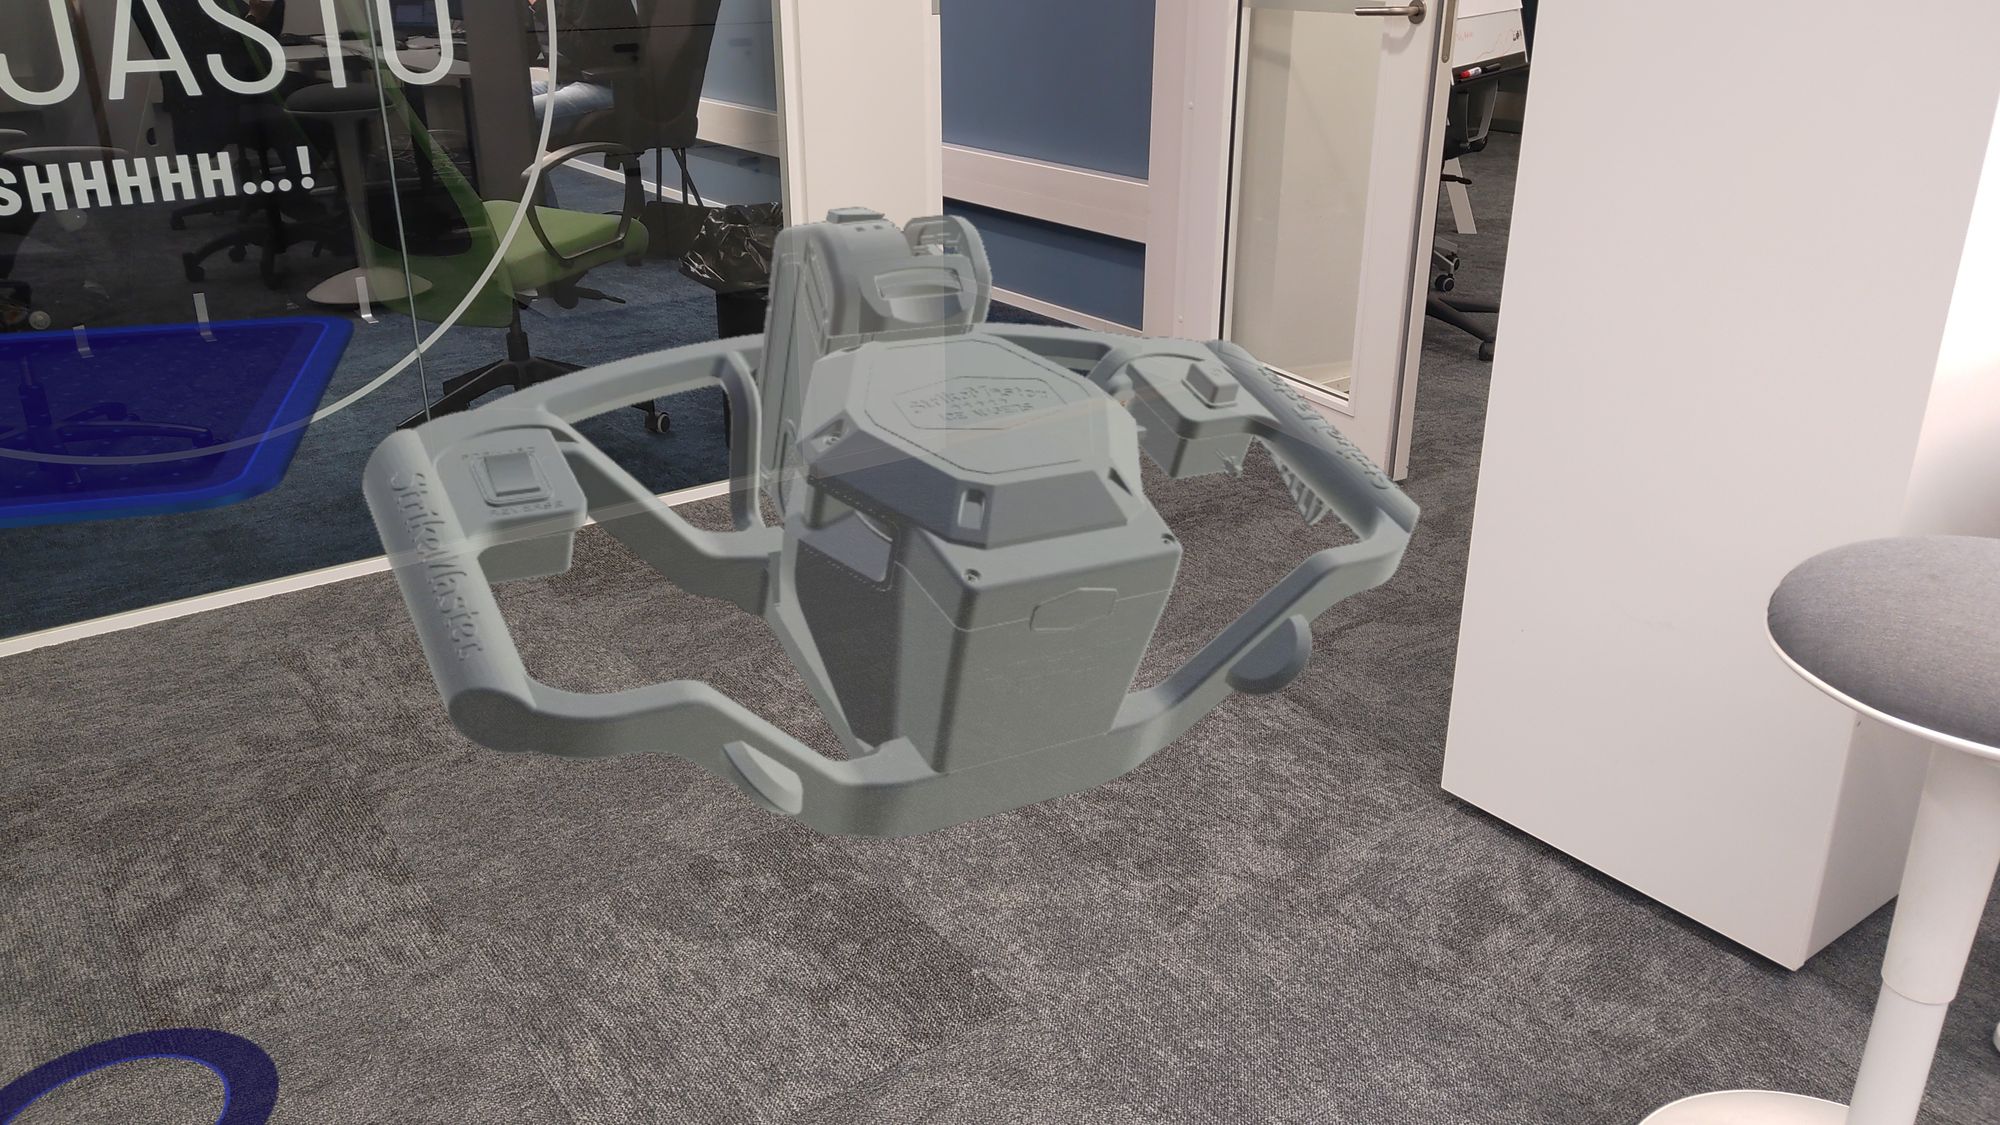
And that's how you bring content into Mesh via Azure Remote Rendering. In the end, it's quite a simple process that you can finish in about 30 minutes. This way, no model is too complicated to bring into your collaboration environment, and this will be crucial for the future and it's Digital Twin models, which we at Sulava are already working with!
If you have any further question, leave them down below! ☁️